It's been a rough couple of days for America.
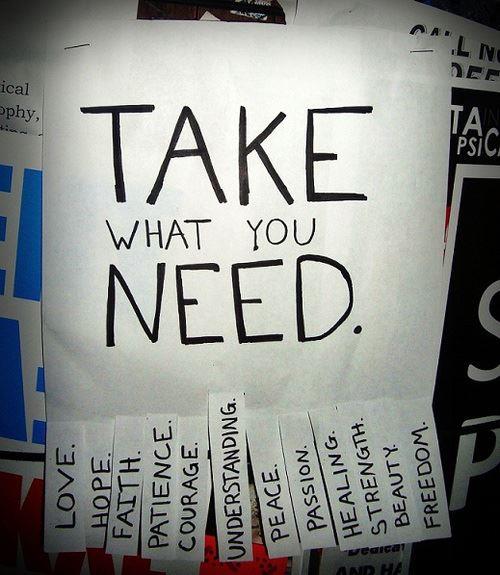
It's the kind of time when we all need to tap into our strengths for those who are running low. Brave people need to be braver. Smart people need to be smarter. Kind people need to be even kinder.
My main strength seems to be finding dorky stuff on the internet.
Here are a few things I've found that help restore hope, peace and dorkyness to my life:
Our 7th graders are studying Ancient Rome. As they work on their Mid-Unit Project, I arranged for them to interview a member of an archaeology team that has been working in Pompeii.
I'll post more about the specifics of this project when it is done, but in the meantime, here is the interview with Leigh Lieberman from Princeton University. Technical Specifics:- We used Skype to interview Ms. Lieberman.
- I used Call Recorder for Skype to record the call. (This application costs $20, but has been incredibly useful over the past several years.)
- We borrowed the largest classroom in our school from a generous colleague, so we could have all fifty or so of our 7th graders in on the call.
- I set up a small desk at the front of the room, next to the interactive whiteboard, with my laptop on it, so each student could ask his or her question on camera.
- I projected the screen from my computer to the whiteboard, so everyone could see it.
- I used a speaker to amplify Ms. Lieberman's side of the conversation, but used my laptop's built-in camera and microphone for our side. It worked well.
- I turned the classroom lights off for the first few minutes of the interview, but worried that our students wouldn't be lit well enough on camera, so I turned them back on. As it turns out, my computer automatically adjusted the light levels to compensate, so it worked out well, both ways.
- We required each of the students to come up with three good questions for Ms. Lieberman ahead of time and we looked them over to avoid any "Do you have any pets?"-type of questions. By preparing the students, we cut down on any knuckle-headedness. (But the bulk of the credit has to go to Ms. Lieberman - she was so fascinating that the students were engaged for the full half-hour and didn't fool around at all. Very few experts are this good at presenting high-quality information in easy-to-understand language without dumbing it down. She was great!)
- While we're at it, full credit also has to go to the students themselves, who really stepped up and acted completely professionally.
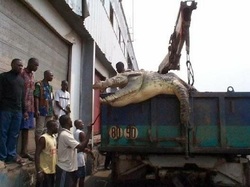 I'm pretty gullible. I tend to fall for internet hoaxes with appalling regularity (which, by the way, is a brand-name I will trademark if I ever market a line of adult diapers), but even I didn't buy this one, when it appeared in the aftermath of Hurricane Katrina in 2005. Supposedly, this giant crocodile was shot swimming up the flooded streets of New Orleans and was being kept in the freezer of a local hotel. Checking it out on Snopes.com, I learned that this photo had been taken in West Africa, several years previously. Because New Orleans was on so much in everyone's thoughts, it was natural for people to see a group of black men with this crocodile and assume that this was one more in the horrific series of tragedies that New Orleanians had to deal with. At the time, I used this in a lesson with my classes to teach a timely lesson on media literacy - to be critical consumers of information.
I had a chance to cover Westward Expansion with some of my 8th graders this year - something I haven't been able to do in several years. This meant that I was able to do one of my favorite activities - Angry Tiki-God Water Polo. Okay, not actually. I just haven't come up with a really good name for it yet. Basically, here is what the activity involves though: 1) I download and print several pioneer memoirs and diaries. 2) I break the students up into teams of three and let each team pick which memoir they want to study. 3) The students use highlighters to mark towns and landmarks mentioned in their memoir. 4) The students look up the places on a map. Internet mapping sources are somewhat useful for this, but many of the 19th Century place names can't be found on modern maps, so GoogleMaps isn't foolproof. A better resource has turned out to be the atlas from the 1957 Encyclopedia Britannica. I had already owned one copy of this awesome atlas (for my money, the best one ever printed) and found another at the swap shop at my Town Dump, but I had to order five or six additional copies from eBay. 5) Students then map the pioneers' routes on laminated U.S. maps and describe the voyage. I've got a particularly engaged group of students this year, but I've gotten a lot of buy-in from them and this project seems like a keeper. New Hampshire State Social Studies Frameworks and Standards met by this project:
SS:CV:8:3.2: Analyze environmental, economic, and technological developments and their impact on society. (Themes: C: People, Places and Environment, D: Material Wants and Needs, G: Science, Technology, and Society)SS:GE:8:1.1: Compare relative advantages and disadvantages of using maps, globes, aerial and other photographs, satellite-produced images, and models to solve geographic problems, e.g., the Mercator projections versus Robinson projections. (Themes: C: People, Places and Environment) SS:GE:8:2.3: Describe how culture, technology, and experience affect perception of places and regions, e.g., images created by mass media or travel. (Themes: E: Cultural Development, Interaction, and Change, F: Global Transformation, G: Science, Technology, and Society) SS:GE:8:3.1: Recognize how physical processes influence the formation and distribution of resources, e.g., the potential for hydroelectric power or coal deposits. (Themes: C: People, Places and Environment, G: Science, Technology, and Society) SS:GE:8:4.1: Describe ways in which physical and human regional systems are interconnected, e.g., canal systems or "hub-and-spoke" airline operations. (Themes: C: People, Places and Environment, G: Science, Technology, and Society)Students will be able to find social studies-related information:- Use economic and geographic data, historical sources, as well as other appropriate sources
- Discriminate to select the most worthwhile and trustworthy sources
- Draw on the diversity of social studies-related sources, such as auditory and visual sources, such as documents, charts, pictures, architectural works, and music.
Students will be able to comprehend the wide range of social studies-related materials by using skills:- Distinguish between primary and secondary sources.
- Detect cause and effect relationships
- Distinguish between facts, interpretations, and opinions
- Recognize author bias; recognize propaganda
- Test the validity of information by using such criteria as source, objectivity, technical correctness, currency
- Draw from the source information at a level appropriate to the task at hand, i.e., skimming for facts or probing for deeper meaning
- Utilize various types of sources such as documents, charts, images, artifacts, and maps
Students will be able to find information:- Use appropriate sources to gain meaning of essential terms and vocabulary, glossary, dictionary, texts, word lists
- Recognize and understand relevant social studies terms.
Students will be able to present information in a variety of ways:- Present visually (chart, graph, diagram, model, Power Point, etc.)
- Present orally (presentation, debate, group discussion, simulation, etc.)
When I ask students to memorize facts by rote - and I do, from time to time - I try to make it as easy for them as possible. I have a series of what I call, "Stupid Memory Tricks". I've learned that the stupider a trick is, the more it makes you roll your eyes and mutter, "Seriously????", the more mind-numbingly moronic it is, the more likely it is to stick in your brain.
For example:
When trying to remember which state is which on a blank U.S. map, I tell my students to imagine Montana and Wyoming as brothers who don't get along very well, sharing a bunk bed. I use my most annoying, piercing, nasal voice and whine, "WHYYYYYY??? WHYYYYYY???? Why does Monty get the TOP BUNK??? WHYYYYY??!!!"
Anyway, this may be my very stupidest memory trick of all - remembering the steps of how a bill moves through Congress:
Actually, I think this video speaks for itself.
Our 8th grade advisories are called "magnets".
I advise the Food Magnet.
Here is a video of a day we spent at the beach last week, building a sand sculpture to symbolize our magnet:
We've got a really good group this year.
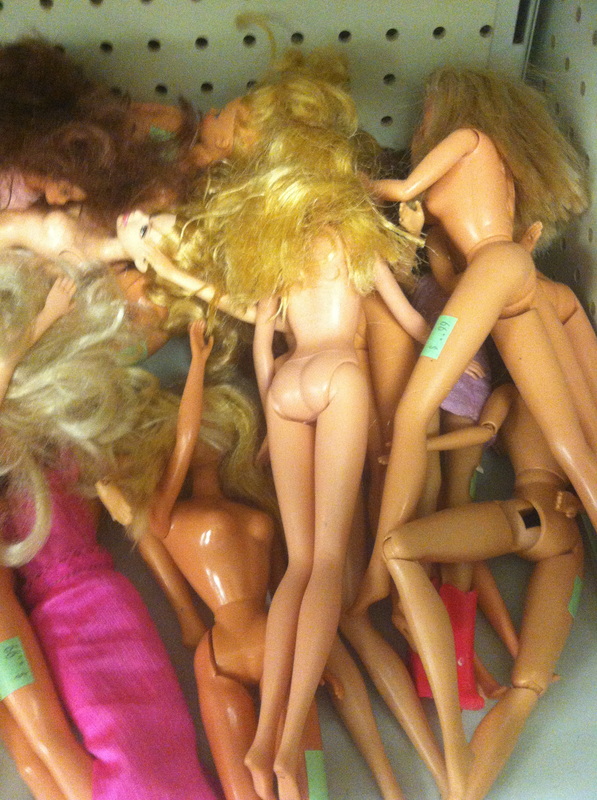 A couple of years ago, I was rummaging through what I euphemistically call my Art Supply Closet - though in reality, I keep everything from actual art supplies to maps, to jars of fermented tofu to a waffle iron (just in case I ever need an emergency wedding shower gift) - when I found a tupperware container of what looked like cloth scraps. I put it out for my students - a group of 13 year-old girls, in this case - who were delighted to discover that it was full of Barbie Dolls and Barbie clothes.
Since then, my students have been able to use Barbie, Skipper and their friends in any number of dioramas and puppet shows.
A couple of days ago, I was shopping at one of the GoodWill stores near me. (Don't make that face; they have the BEST teacher clothes!), when I discovered a bin full of Barbies for 99 cents each.
I don't happen to need any at the moment, but if you're in Hooksett, New Hampshire by any chance, you should pick some up.
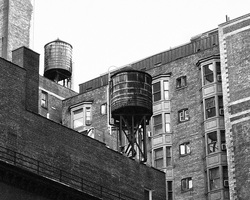 So, just for the sake of argument, let's say you are an enormous, enormous nerd. And further, that you are listening to a story in a podcast about the work crews who install wooden water tanks on rooftops in New York City. And - hypothetically speaking - let's say you realized you could use that segment of the podcast next Spring in one of your lessons about the New York City water system. Would there be an easy, elegant way to save just that small bit of the podcast? As it turns out, there would.
|
 RSS Feed