On the first day of school, I tell my students that I don't have a seating chart in my classroom; they can sit wherever they want... UNTIL they make it necessary for me to assign them seats! If they want to sit next to their friends, that's fine, as long as they aren't distracted or distracting and NOBODY is allowed to kick anybody out of "their" seat.
This works pretty well for the first several weeks of school, then one by one, most of my classes descend into knuckleheadedness and I need to assign seats. This can lead to a lot of moaning, complaining and convenient forgetfullness. ("Oh... I was supposed to sit over HERE??? I totally forgot!!")
For me, the solution to this, as in most things, is PowerPoint.
On the morning when I assign seats, I have the students line up against the back wall of the classroom with their books, turn out the lights and show them a Spectacular Seating Chart PowerPoint!!
Each student's picture appears on screen with some sort of amusing sound effect. The student in question blushes, while everyone else has a good-natured laugh at their expense, then the PowerPoint indicates where they should sit. After all the students have taken their new seats, I re-emphasize that assigned seats are a management tool and not personal. The students usually take it pretty well.
Interestingly enough, because our classrooms have thin walls, 8th Graders in other classrooms hear the funny sound effects and laughter from my room and when then get to my class, they usually want to see the other class' seating chart. Often, they are so amused that they ask for a seating chart of their own.
Well, that's how it's worked for me, anyway.
Here is how I build a Seating Chart PowerPoint:
(Click on any of the pictures for a more detailed view.)
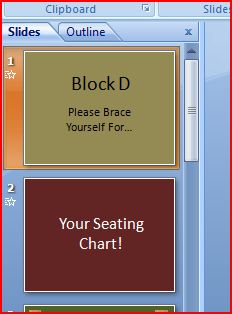 I generally start every PowerPoint with an Introductory slide or two. When I first started using PowerPoints, I thought it would be nifty to include a drumroll sound effect. Unfortunately, the only drumroll I had at the time was about ten seconds long, which doesn't sound all that long, but really is. Students complained so much about it that I started putting in longer and more elaborate sound effects on my introduction slides, until now it has become something of a joke with my students that each introduction is bigger and more over-the-top than the last, which they seem to like.
In this case, I've used the Theme from 2001 for Slide 1. I've followed this up with the theme from the Dick van Dyke Show for Slide 2.
This is all optional, of course.
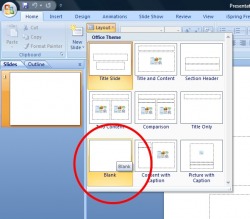 Step #1 - Selecting a Background
I don't know about you, but it really bugs me when I start a new slide in PowerPoint and the template for a title and a subtitle automatically pops up. I make a point of selecting the "Blank Slide" setting under the "Layout" menu.

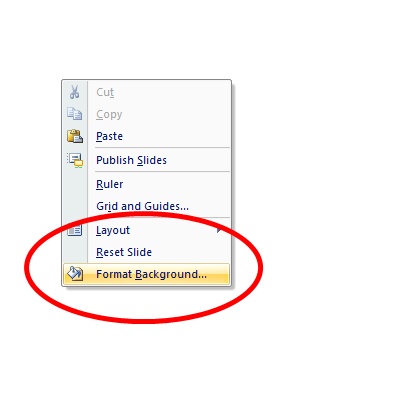
Then I pick a background color.
I do this by right-clicking the slide and choosing the "Format Background" option.
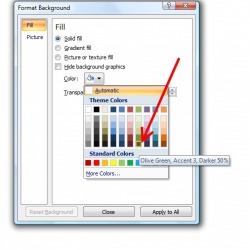
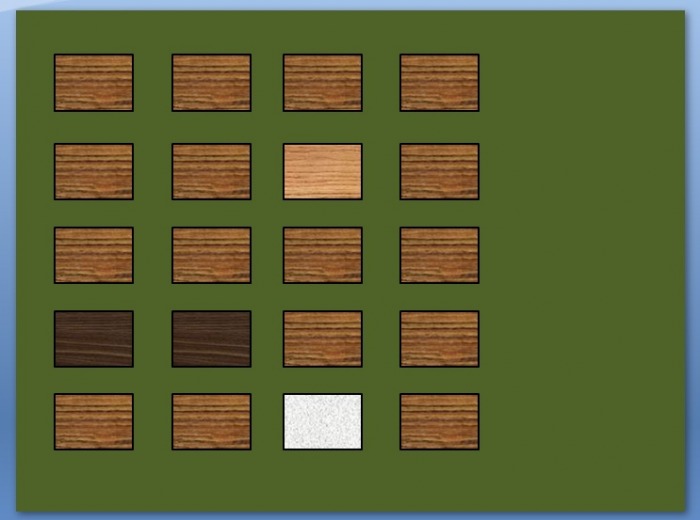
I generally pick a bland color for the background - something classy, but non-distracting. I like an dull olive-green: it feels kind-of calm and pool-table-y.
That's just a personal choice, of course.
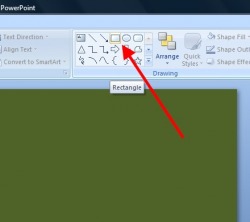
Step #2 - Making Desks
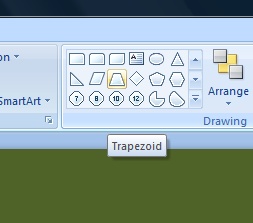
From the Shapes menu, select a rectangle and draw the basic outline of a desk.

If the desks in your room aren't actually rectangular, other shapes are available.
My students actually sit at trapezoidenal tables, but for the purpose of this explanation, I'm going to use demonstrate a seating chart for a classic, 20 desk classroom.
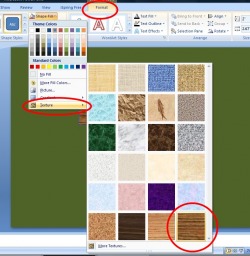
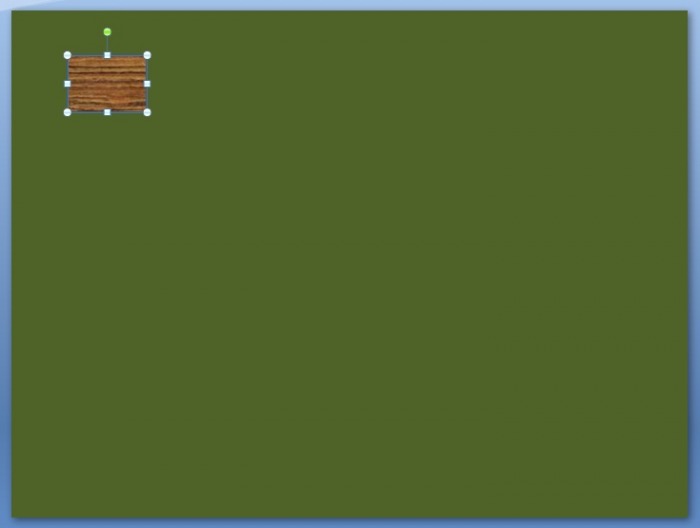
Click on the desk you've just drawn and choose, "Format", "Shape Fill" and "Texture". This will provide you with several options, a couple of which will more-or-less approximate the general appearance of the desks in your room.
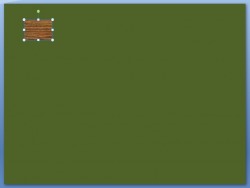
Resize your desk by clicking and dragging on on of the circles on the corners of the shape, then drag the desk to where its real-world counterpart is in your classroom.

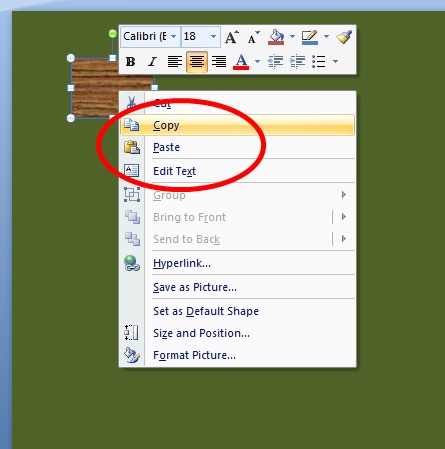
Now, to make your life easier, right-click your desk, select "Copy" from the menu and "Paste" in an exact duplicate.
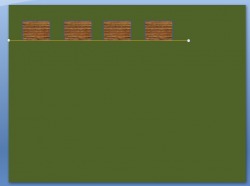
Keep doing this until you've got a row of desks. If you don't trust your ability to do this by eye, insert a line to guide you, then remove it once you've got the desks placed.
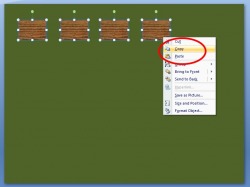
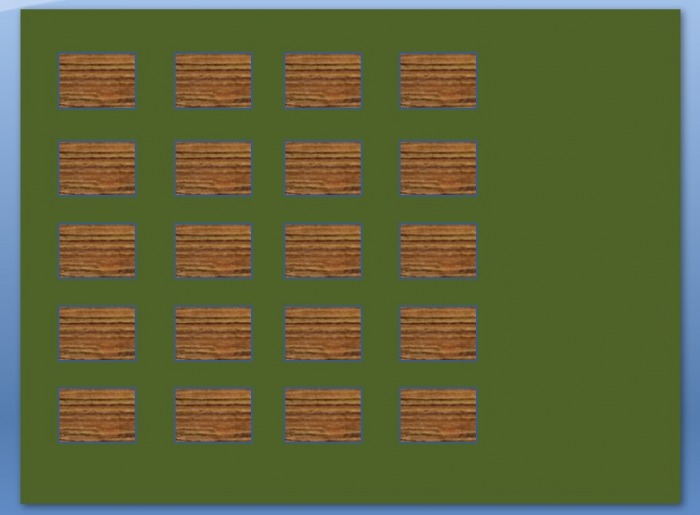
Now, select your row of desks and do the same thing all over again:
Copy...
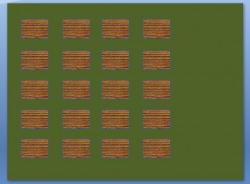
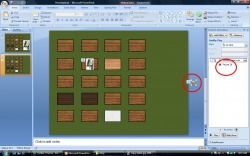
... and Paste, until you have all the desks placed into a reasonable representation of your classroom.
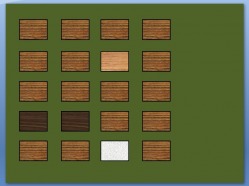
If the desks in your classroom are as mismatched as the ones in mine, you might want to change the textures in a few of them to reflect your actual state of affairs.
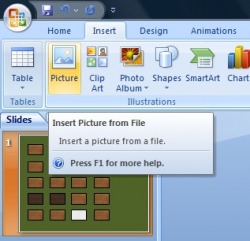
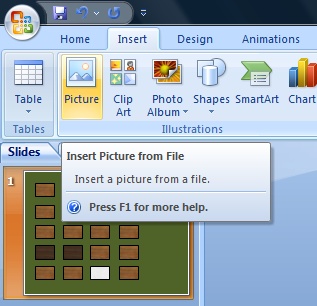
Step #3 - Inserting Students
Now, insert a picture of a student. You've probably left enough blank space in some part of the slide to fit a good-sized photo. (You wouldn't BELIEVE how long it took me to figure THAT out!)
 Where To Get Student Pictures:
I generally use the students' ID pictures. I go on the school's server and find the pictures. (In a different place every year!)
It would be a pretty straight-forward process to take pictures of the kids yourself - or better yet, have them take pictures of each other. There are always students who don't like to have their pictures taken, but I've found that if I give a camera to a couple of competing "alpha-girls", they manage to get really good pictures of everyone. Almost any boy will let a cute girl take his picture and the weird, intensely complicated rules of girl politics will allow the photographer girls to shoot other girls, particularly if there are competing social cliques at play.
(Hey - I don't claim to understand it; I just try to harness it for Good instead of Evil...)
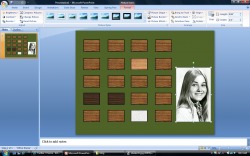
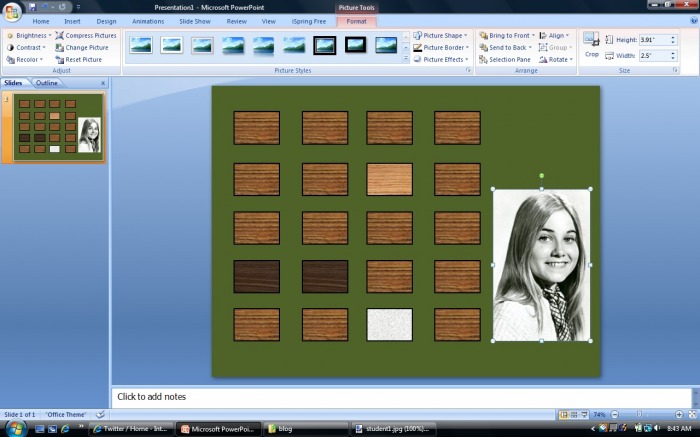
To protect my students' privacy, I'm using a picture of Marsha Brady here.
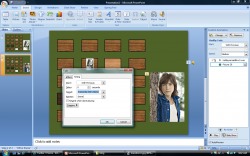
 Step #3 - Custom Animation
This next step is the closest we're going to get to anything tricky (but it's really not very tricky at all):
Go to the "Animation" menu and select "Custom Animation". This will bring up a sidebar that allows you to select different visual and sound effects.
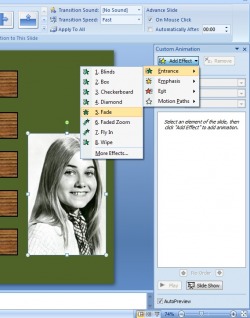
Select your student's picture, then, on the Custom Animation menu, select "Add Effects", "Entrance" and whatever effect you want to use to bring the picture up when you show this slideshow. You could have it fly in or unfold in sections like a window shade, but my favorite effect for this sort of thing is a simple, "Fade".
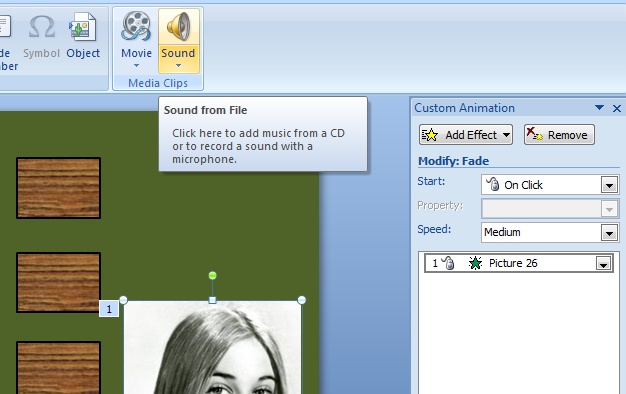
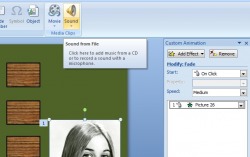 Next, choose the "Insert" menu and select "Sound". This will allow you to have the picture of your student appear with an amusing sound effect that will make you look really cool. (Or in my case, slightly less lame...)
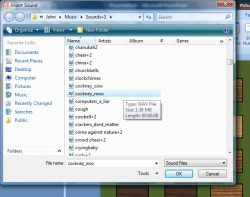
I've collected quite a few soundclips over time to use for this sort of thing. They are all saved as .wav files. I try to find some sound effect that is either very much in line with a student's personality or very much NOT in line.
Thus, all the hilarity.
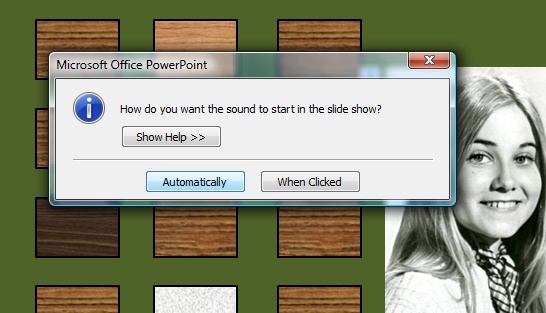
 At this point, PowerPoint will ask you if you want to start the sound effect automatically or when you click the little loudspeaker icon.
Choose "Automatically".
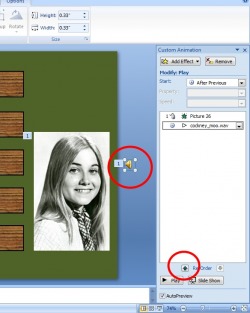
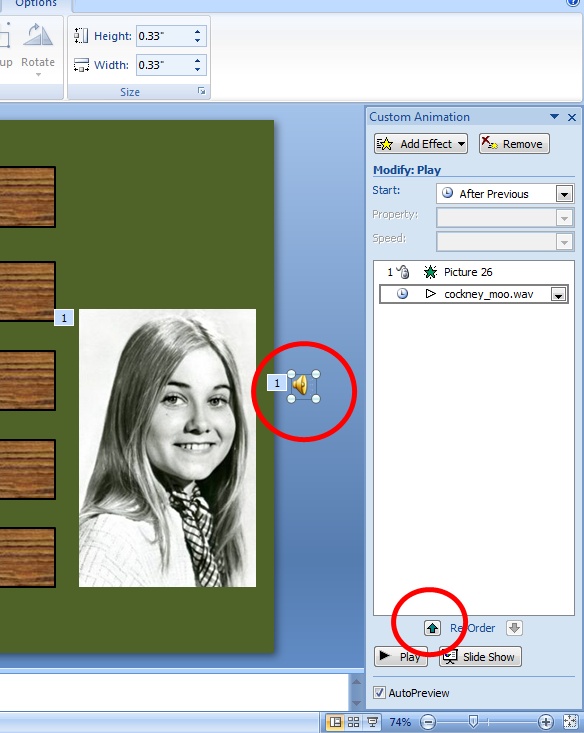
I generally drag the little loudspeaker icon off to the side of the slide. That way, I always know where it is and it won't clutter up the look of the slide.
Now, select the sound effect on your Custom Animation taskbar and use the "Reorder" command to move it to the top of the list.
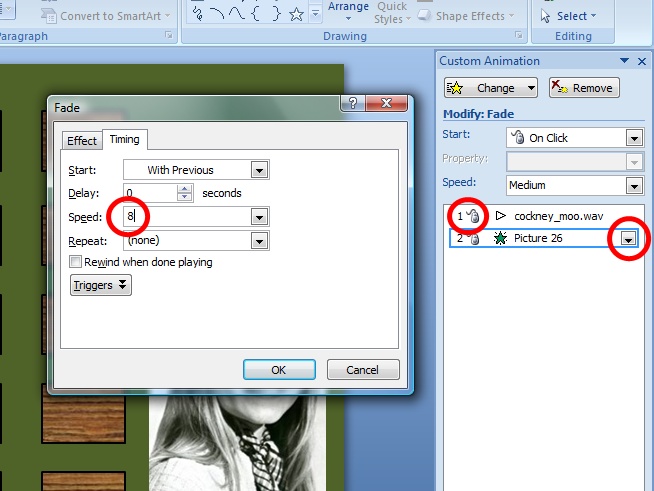
 Now that your sound effect is first on the list, change it so that it starts "On Click"
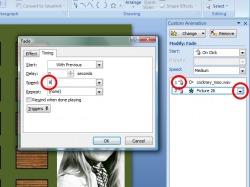
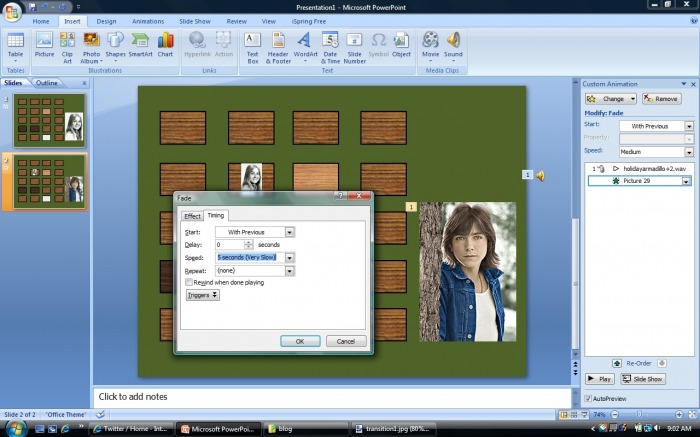
Next, change the properties of the picture's animation. There is a little menu arrow to the right of it on your Custom Animation menu. If you click on that arrow, a whole new menu will pop up.
Select "Timing", then "Start - With Previous". This will make sure that the sound and the picture animation will run simultaniously.
Then select your speed. You will have several options, like "Fast", "Extra Fast", "Warp Speed" - that sort of thing - but you can also type in an actual number of seconds that you want it to take for your picture to appear. If you type in the same amount of time as the length of your sound clip, they will synch perfectly.
 Step #4 - Making New Slides
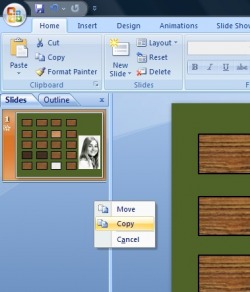
If you look on the left-hand side of your screen, you will see a menu with all the slides you've made so far in this presentation. Select the slide you've just created and copy it.
You can do this by clicking it and dragging it. PowerPoint will ask if you want to move it or copy it. Select "Copy".
Depending on what version of PowerPoint you have, there may also be a command under the "Insert" menu, called "Insert Duplicate Slide". That will work well, too.

Now, you have two identical slides.
(Which, I suppose, is sort of the point...)
 In your new slide, resize the picture of your student to fit the desk where you want her to sit, then move her there.
Now, remove her sound effect and her animation. Those effects will still be in place on the first slide, but you don't want them here.
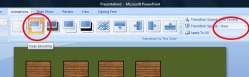 Now select the "Animation" menu again and choose the options, "Fade Smoothly" and "Slow".
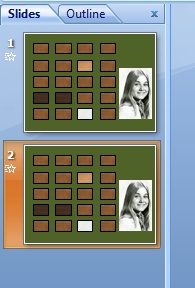
Basically, this means that when you run the slideshow, you will start with an empty set of desks, you will advance to show your first student appearing with an amusing sound effect. (In this case, Marsha Brady appearing with a cow mooing with a Cockney accent.)
Then, when you advance again, the slide with the big picture will fade smoothly into one where Little Marsha is sitting happily (and if you ask me, a little smugly) in her seat.
 Now, add your next student to the second slide and keep doing all the same steps, over and over again.
Because you will copy each new slide in order to make the next one, all your cumulative changes will come with you and the little pictures of the students will stay in exactly the right spots.
 When you are done, you will have a full seating chart.
This is EXTRA cool, because you can print off a copy of this final slide and put it in your sub folder, so that when you are out sick or at a conference, your substitute teacher will have a visual layout of who sits where and even if the students give her fake names, she will still know where they sit.
This year, one of my classes managed to get through the whole year without a seating chart. They were a little disappointed about that, so on the last day of classes, I gave them a seating chart PowerPoint. (I seated them in the same places they'd been sitting at on their own all year.)

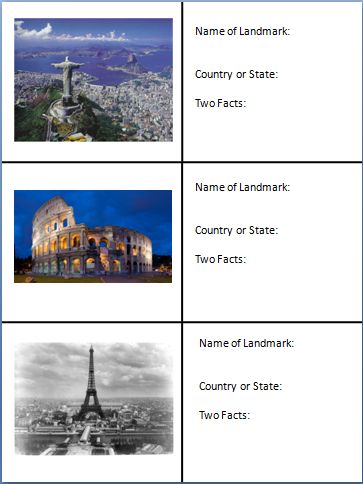
So, yesterday I spent about two and a half hours in Microsoft Word, trying to make up a nine-page work packet for a qeography quiz I'll be giving in the next couple of weeks.
What I wanted was fairly straight-forward. I wanted each page divided into two collumns of three boxes of approximately equal size. I wanted to put the same text in each of the boxes on the right and a picture in each of the boxes on the left.
Problems:
1. If there is an easy way to make multiple copies of a page in Word, I couldn't find it. (I won't tell you the lengths to which I went trying to do this.)
2. If there is an easy way to insert a picture into the boxes on the left without messing up the fomatting on the page, I couldn't find that either. (Not even creating multiple layers of text-boxes, which is my usual first line of attack in Word.)
3. Copying and pasting lines did not put them in the exact positions I needed them to be in, so I ended up... You know what? It's just too sad to talk about.
Anyway, there I was, getting more and more frustrated and I couldn't figure out why the geniuses at Microsoft hadn't made this easier to do.
"Why?" I asked the ceiling and my surprised four-year-old, who was just trying to watch the Wonder Pets in peace. "Why is this SO HARD?! If I was doing this in PowerPoint, it would take.. about.. three... Oh, man. I am such a moron sometimes.:
My son, seeing that his help was no longer needed, nodded in agreement and turned his attention back to his creepy singing animals.
So, this is how I used PowerPoint to make up my worksheet in less than ten minutes:
 Start a new PowerPoint presentation.
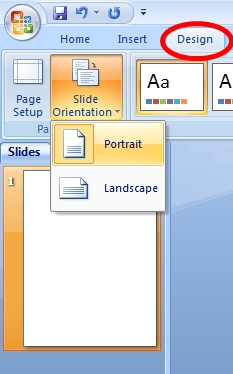
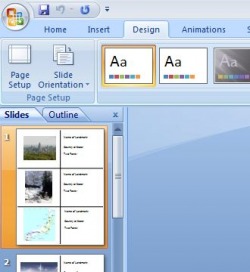
From the menu tabs at the top of the page, select "Design".
Click on the tab that says "Slide Orientation" and choose "Portrait". This means that your slide will be vertical, like a sheet of paper in a worksheet.
Using the "Insert Shapes" commands, divide the page up into grids.
Insert a textbox into one of the boxes where you want text. (There's a certain symmetry to that, isn't there?) Write whatever text you want.
Once you've got the text the way you like it, click on the margins of the textbox, copy it, then paste it into the other boxes in that column.
 Choose the page from the page menu on the left side of your screen and copy it several times. You can also use the "Insert Duplicate Slide" command to do this.
Insert pictures into each of the boxes, or copy and paste them from another PowerPoint presentation, then resize them to fit.
Save your work.
Print the slides, copy and staple them.
Go make yourself a refreshing celebratory beverage.
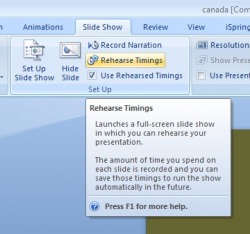
How is it possible that I've been using PowerPoint like a madman for what - six? seven? years and I never knew about "Rehearse Timings" until now?
Because I'm sort of an idiot.
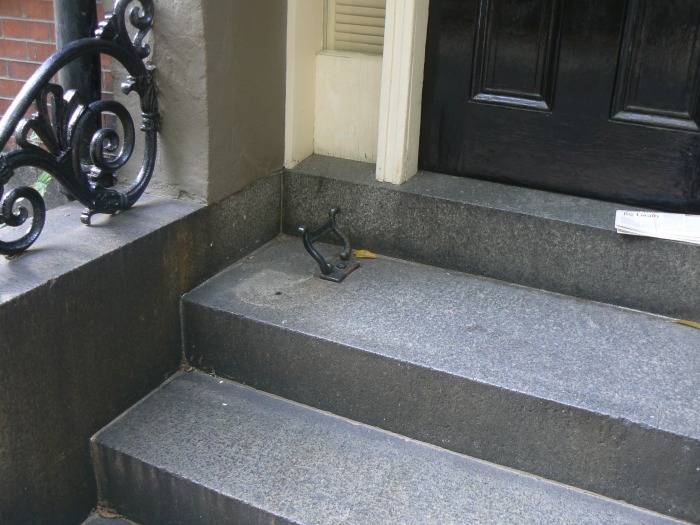
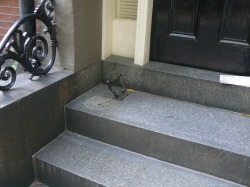 This past week, I found myself teaching an unlikely lesson to our 8th graders - the importance of horse manure in American History. (Surprisingly, it is a HUGE part of our development as a nation.)
Anyway, I was showing a PowerPoint to my students of pictures I had taken a couple of years ago on a photo-tour of Beacon Hill in Boston. I'd noticed that most of the ritzy old houses had bootscrapers mounted on the front steps and knowing that I could use this someday in class, I started taking pictures of each one we came to. At first, the other people on the tour just gave me surprised looks and quizzical smiles, but then after a while, they started to gravitate toward my wife and ask if I had "issues".
I was explaining this to my class when one of my students interupted me and asked, "Oh, you mean like your 'issues' with PowerPoint?"
It's a fair point - I use PowerPoint a LOT in my classroom. I should probably move on and learn newer and better tools, but I'm still getting so much out of this one program that for the forseeable future, I'm afraid I'll look at most classroom computer applications as PowerPoint and Other Stuff.
[I did have a TeacherFeelGood moment last week involving PowerPoints. I was kicking off a new unit with a PowerPoint. A new girl was sitting in the front row and when I announced that we'd have a short PowerPoint, she put her head in her hands in dispair. The boy next to her tapped her on the shoulder and said, "No. It's okay - he's really good!" It made me feel like Mr. Kotter.]
 Anyway, I've discovered another cool new PowerPoint trick.
I was directed to a REALLY interesting podcast by a colleague on a Social Studies forum. It discussed the idea of "non-linear PowerPoints" - in other words, slideshows that are not designed to be viewed in any particular order. (A good example of this is the Jeopardy PowerPoint I discussed in the previous post.)
The ideas they discussed got me thinking about how I use PowerPoint and how useful it might be to help students review for Geography quizzes. I'm a big fan of online mapping games. They are really useful to drive home a geography lesson - if there happens to be a game out there that deals with the particular lesson you've just taught. Unfortunately, for about half of my geography lessons, the places and features that I want my students to memorize are pretty eclectic and aren't the sort of items that you're likely to find on a mapping game.
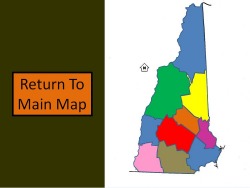
Take my lesson on New Hampshire, for instance.
I ask my students to memorize each of the counties and several cities, rivers, mountains and lakes in New Hampshire. These are good and worthy things for my particular class to know, but let's face it, this is not universally vital knowledge. Nobody is going to put the Ashuelot River on a mapping game designed for wide distribution.
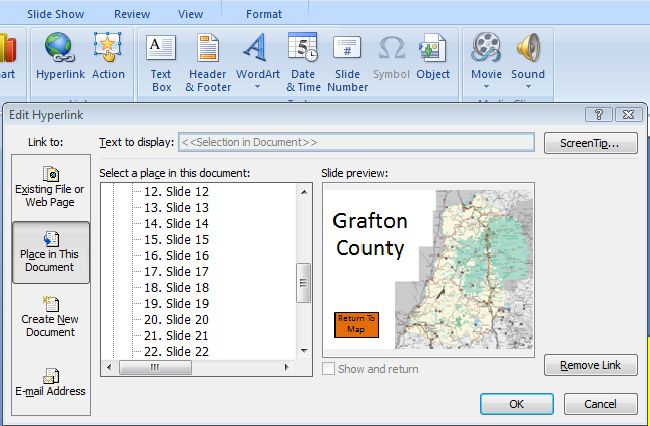
But what if I designed a PowerPoint with a map of New Hampshire and put all those features on the map? I could outline each city, county, feature, etc... with an invisible box, then link each one to a slide that identified it. Svetlana and Bruno, my hypothetical students, would point their cursors to the weird, obscure river in the southwest corner of the state, take their best guess as to what it is, then click it to see the answer. They would jump to the appropriate slide, go, "Ohhhhh... THAT Ashuelot River!" then click another link to take them back to the main map.
They'd be mapping geniuses!
 So, does it work? Is it all rainbows and unicorns?
Um. Acutally, yes.
It was actually very easy and even my first interactive studyguide went together in an hour or two. (Future ones should be a little faster.)
There are just a few tricks. Here's what I learned:
 1. Use the FreeForm drawing tool to outline counties, countries, rivers, lakes, etc... It will be easier to do this if you zoom in and view the shape at several hundred percent of its actual size. (See my previous post on outlining for more information.)
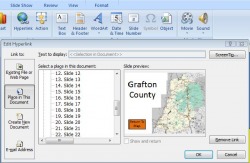
2. When you've outlined the feature you're interested in linking a page to, make sure it's selected, then choose, Insert/Hyperlink/Place In This Document.
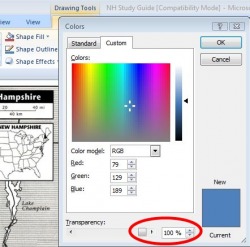 3. When highlighting a city (which is too small to make an easily clickable link) or a really irregular shape like Lake Winnepesaukee, outline it with a circle (or a square or a trapezoid, if that's more your style), then format it to be 100% transparent - in other words, invisible. Make sure you do this for the outline and for the fill.
4. Select all the pages, then choose "Animation" and format the transitions between pages so that you can't move on to the next page by time OR by clicking. (Uncheck the boxes.) This means that your students will only be able to navigate by clicking your hyperlinks and not accidentally moving onto the wrong page by hitting the spacebar or anything.
If you want to take a look at my first attempt at interactive, non-linear, hyper-awesome PowerPoints (or if you need a studyguide for New Hampshire), feel free to download it here.
Several years ago, I found an amazing PowerPoint presentation online and immediately, exuberantly and shamelessly stole it.
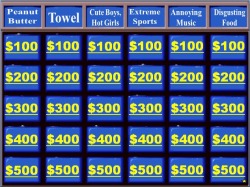 It was a template for a round of Jeopardy that could be customized with any topics, questions, pictures, sounds, etc..
It worked so well that I started using it to review with my classes before all major exams. (This one on the left is to review before our Geography Final Exam. The category "Cute Boys, Hot Girls", by the way, deals mostly with Hummel figurines and saunas. It's never too early to introduce teenagers to the concept of Bait and Switch.)
This tool was so cool that over time, I tended to show it off to any teacher who would stand still long enough for me to shove my laptop in their face. Almost everyone's response (after, "Hey! Get that laptop out of my face!") was "Wow! Where can I get that?"
Unfortunately, I was somehow never able to find it online again. I went under the assumption that Viacom's lawyers had had the website taken down or something, so I generally passed on my copy of the basic template to other teachers on disk.
 Jump ahead several years:
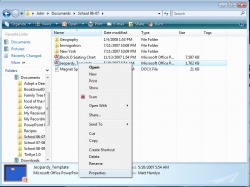
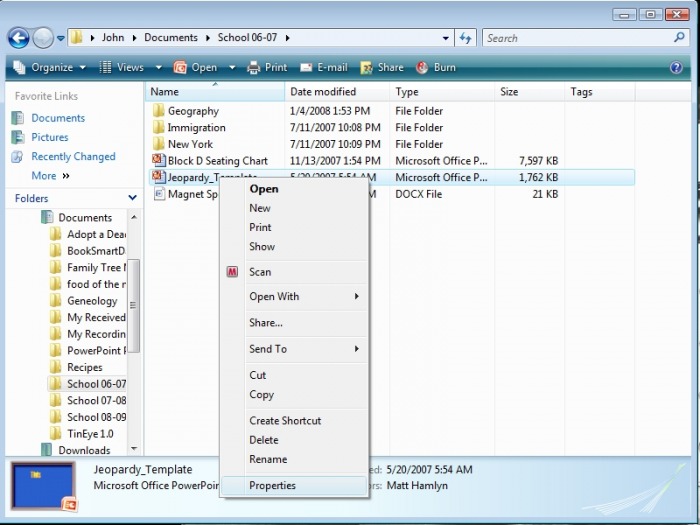
Lately, I've been enthusiastically right-clicking all sorts of images and choosing the "Properties" icon.
A few days ago, I had the WAYYYYY-overdue brainstorm of doing this to my Jeopardy PowerPoint template.
 Yup.
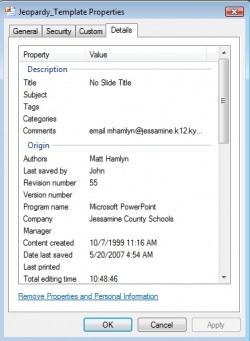
There it was under "Authors". This PowerPoint was designed by a guy named Matt Hamlyn and was worked on by some guy named John...
Oh, wait - that's me.
Anyway, I googled "Matt Hamlyn" and the first search result to come up said, "If you're looking for the Jeopardy PowerPoint, go to this link..."
"Doh!"
Anyway, if you'd like to download a very cool tool for your classroom, please go to Matt Hamlyn's website at:
http://staff.fcps.net/mhamlyn/ppt.htm
I'll be over in the corner trying to figure out how doorknobs work and other hard stuff like that.
"Does This Look Crooked to You?"
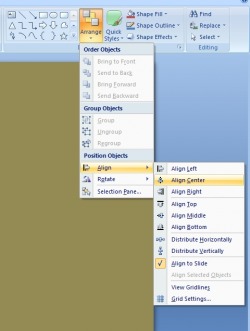
Did you know that there is a command that will automatically center your pictures or text boxes in PowerPoint?
I didn't.
To Paraphrase Homer Simpson, "And I've been clicking and dragging all these years by myself, like a CHUMP!"
Sigh...
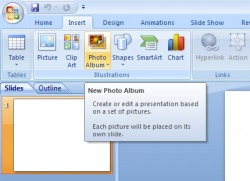 "Insert Photo Album"
In any given PowerPoint that I put together, just about every slide has a picture in it - sometimes two or three. (I put together a Food of the Month presentation last year with a slide that had twenty! What was I thinking?) One of PowerPoint's biggest strengths is that it lets you use strong visuals to get your points across.
This is how I used to put pictures into a PowerPoint presentation:
I'd go looking for a picture online, then when I found it, I'd copy it, then paste it into my slide. I learned the hard way to use the biggest pictures possible - it turns out that if you shrink a big picture, it looks fine, but if you try to expand a small image, it gets all pixelated and shmutzy. So, I'd paste in this big picture and it would actually be too big for the slide, so I'd have to drag it around until I could click on the corner and shrink it, then drag it around and click and shrink and drag and click and shrink, until it was finally the right size, then fool around with it until it was positioned correctly.
Then I discovered that all my PowerPoint files were insanely large.
After some experimentation, I discovered that if I saved the pictures I found online to a folder and used the "Insert Image" command in PowerPoint, my slideshows were a much more managable size, but I still had to do the drag/click/shrink thing over and over on each slide.
There had to be an easier way.
It turns out that yes... um... actually there is.
If you have all the pictures you want to use in a folder somewhere, all you need to do is open PowerPoint, choose the command "Insert" and "Photo Album". PowerPoint will ask if you want to make a new slideshow. You will say, thank-you-very-much-yes-I-would-if-you're-sure-it's-not-too-much-trouble (or something to that effect). You tell it which folder you want to take the pictures from and, BAM! There you go. You've got a brand new slideshow.
The whole thing takes less than a minute. I'd really like to come up with some clever story here that would make this seem like a bigger deal, but it really is that moronically simple. (That's why it only took me five years to figure it out.)
Try it. It's really fun.
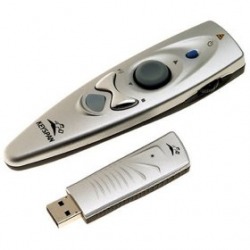 Toy #1
A Remote Control For Your Computer
Okay - the question is a natural one: Why?
"Isn't all this technology distancing me enough from the rest of my life already? Why would I want to get even MORE remote?"
I can answer that with two words: "Teenaged Boys".
If you've been in the classroom for any length of time, you know that it is a very bad idea to turn your back on certain students. If you have any "difficult" boys in your class (and really, isn't "difficult" the most flattering way of describing some of your boys?), you know that the idea of sitting at a computer in a dark room with your back to the students is basically courting catastrophy.
Yes, of course there are ways to contain the damage. You can pause the slideshow or movie that you are showing periodically to ask pointed questions of particular students to make sure that they are paying attention. You can spin around and give the Evil Glare of Doom to somebody each time you hear a suspicious noise. You could make one of the worst offenders your special AudioVisual Assistant.
Ultimately though, you still end up in a darkened room chained to a computer with your back turned to most of your students.
Now, imagine a remote control that allows you to walk around BEHIND your students as they watch your brilliantly dorky PowerPoint presentation. You've heard a distressing amount of whispering and giggling from one corner of the room as you've been showing pictures of Lake Titicaca or lecturing on Manhattan Schist. (Or maybe that only happens to me...) You can walk around and stand next to the Giggle Brothers and maybe even lean on the desk between them as you make your next point and effortlessly move on to the next slide.
Remote controls for your computer are reasonably inexpensive - usually under $100. (I got the one I use everyday for about $40 at Radio Shack.) They can range from the really simple to the extremely complex, from unbelievably easy to use to very, very difficult.
I've only tried a few different models - mostly because I really like my original one - a Keyspan PR-US2 Presentation Remote. I really like its simplicity; it has an almost zen-like lack of cool features. It has a left-click button (which corresponds to the left button on your mouse), a right-click button (which opens up all the magic possibilities of right-clicking), a small pad that moves a pointer, much like a mouse, and a laser-pointer.
I like it - aside from the laser-pointer, it doesn't do anything a mouse doesn't do, but it is basically idiot-proof, which is pretty much what I want it to be proof against. The downside of this particular model is that the mousepad is twitchy and takes some getting used to.
Okay, a LOT of getting used to.
The weird thing is, having put in the effort of learning how to use my twitchy little blue button (Okay - that sounds a little dirty, but it is better than the word "knob", which is the only other one that springs to mind.) I really don't feel as comfortable using the other, theoretically more user friendly models I've tried.
There are rumors though, of a new remote that is sleek, exotic, sexy and sophisticated - in other words, everything I'm not and would like to be. There have been press releases. There have been reports on technology podcasts. I covet this remote. Tragically, it doesn't seem to exist yet.
Geek Alert! - Warning: This post is pretty tech-geeky (unless you actually know something about computers, in which case, you'll wonder why I'm making such a big deal out of something so simple...) I teach a Computer Applications class to 7th and 8th graders as an IA. It is a half-year class. For the first marking period of the class, the students do a lot of exploration and learn a bit about doing internet searches, editing photos and sounds, using PowerPoint, word-processing and other basic computer applications. For the second half of the course, I have each student choose a topic, then build a project that includes aspects of everything he or she has learned over the course so far. This generally means a PowerPoint that showcases other types of work.  One of my 8th graders is fascinated by a one-celled organism called euglena. This particular student is extremely tech-savvy and enthusiastic. (He knows much more than I do about many computer applications.) While searching online, he found a website with a short movie featuring these one-celled organisms. He really wanted to include this movie in his PowerPoint. (I don't have a problem with that, as long as he cites his source - he's not going to try to make money with this or anything.)
Unfortunately, this was easier said than done:
 The website simply has a window that shows the movie. When you go there, a box appears in the middle of the screen and a moment later, there is a short movie running there. There aren't any options for downloading the video.
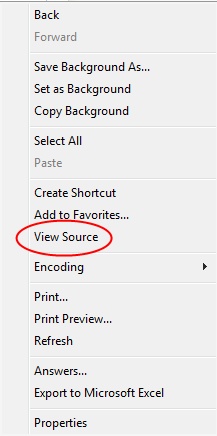
I addressed this in a typically over-elaborate and complicated way. There is a command called "View Source" that allows you to read the computer code that a webpage is written in. (See the picture on the right.) By reading the code, this student and I found out the actual filename of the video, then used Zamzar to convert and download it. (See previous post for information on Zamzar.)
It was only later, that I realized there was a simpler way of doing this.
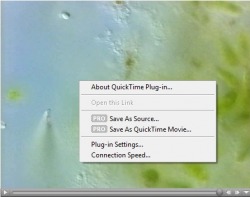 I could have just right-clicked.
On the any pc-type computer mouse, there are usually two buttons. the "left-click" button that you almost always use with your index finger and the mysterious, almost threatening button on the right that most computer users never use and try to avoid because it confuses them.
The right click is your secret best friend.
Clicking anything with that right-hand button will open up a window of options in any given situation that you never dreamed about.
Including, in this case, the option to just download the darn video without having to search through all that code.
(As it turns out, though, this particular movie is a Quicktime movie - meaning that it is Apple-based. PowerPoint is PC-based and the two don't get along. I would have still needed to use Zamzar to convert the Quicktime movie (.mov) to a format more suitable for PowerPoint (.mpg). Did I just make your eyes glaze over? I'm really, really sorry. I'll try not to do that again.)
Once I had actually downloaded the euglena video though, there was a second problem - it was an insanely large file. Yes, the video was "short" compared to Citizen Kane or something, but it was over nine minutes long and really, really huge - 26 megabites: way too big to fit easily into a PowerPoint presentation.
There had to be another way of finding euglena video footage that was a little more user friendly. 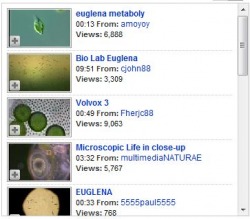 As it turns out, there was. Is. Er... whatever...
On a whim, I looked up the word "Euglena" on YouTube. "What are the odds," I asked myself, "that anyone would be geeky enough to actually post footage of a single-celled animal-like alga on YouTube?"*
As it turns out, quite a few. My student and I are somewhat spoiled for choice vis-avis euglenic video footage.
So I guess the main lesson to be learned from all this is, K.I.S.S. - "Keep It Simple, Student". Or Teacher. Er...whatever...
* When I asked my wife this question, she pointed out, "You would."
Sadly, she's right.
I use PowerPoint a lot in my classroom to teach mapping skills. One very useful PowerPoint tool that helps me do this is its ability to animate shapes and lines. I can make a line, like a river or a border draw itself on the screen. I can make it repeat itself over and over in a loop so that students can draw along with it. This is also useful for having arrows draw themselves to point out a particular feature on a slide.
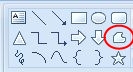
How to do it: 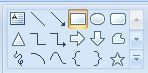 Somewhere on your PowerPoint toolbar or menu, you will find a box of shapes that you can insert into your slide. It should look something like this. (Each version of PowerPoint has it stored somewhere different, so it will be easier for you to find if I DON'T give you directions on where to find it.)
 If you are tracing a squiggly line, like a river on a map, choose the squiggle tool. If you are drawing a straight line or an arrow, choose one of those tools.
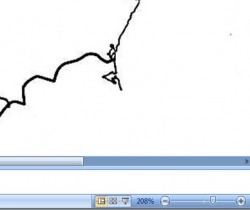 Squiggly lines can be hard to trace. To make things easy for yourself, enlarge the view of your slide - maybe to something outragious, like 300% or 400% - that will make it easier for you to match the curves of the line.
 Once you've drawn your line, it will show itself with a box around it like this to let you know that you can edit it. If you look closely, you'll notice that I was a little messy when I was tracing the Connecticut River. There is a way to fix that without redrawing the line.
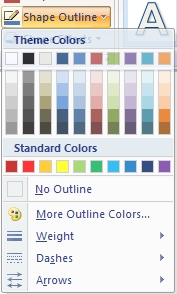 If you double-click or right-click on the box outlining the line you just drew, you can edit it. Pick a color that will make it stand out, then pick Weight, which allows you to make a thicker line. If you went outside the line with your tracing, making it thicker will probably fix the problem.
I don't have a picture to illustrate the next step, but it is very, VERY easy!
1. Go to the toolbar at the top of the page and choose Animation.
2. Then choose Custom Animation.
 3. Click on Entrance.
4. Choose Wipe.
Congratulations, you've just added a line that will draw itself in your slideshow! Now all you have to do is fool around with the details.
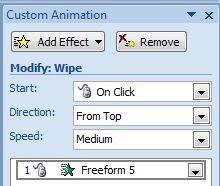 The Details:
You have to decide how fast you want your line to draw itself and from what direction it will draw itself. You will also need to decide if you want it to happen automatically or when you click your mouse. You can do all this at the top of the Custom Animation menu.
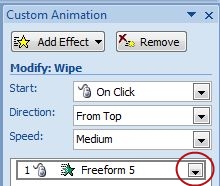 If you want the line to draw itself over and over:
On the right-hand side of box where your new line is listed in Custom Animation, there is a menu arrow. Click on that, then choose, Timing.
 Use this menu to determine how many times you want the line-drawing process to repeat itself. The choices are pretty self-explanatory.
You're done! Congratulations! Look at you - all design-y and stuff!
|


 RSS Feed